
To photograph a document with a phone, create four conditions before you press the shutter: use diffuse or indirect light, keep the phone parallel to the page, include all four edges, and check that the smallest important text is sharp. If the page is glossy or awkwardly shaped, use the phone's document-scanning workflow when available; those tools can detect page boundaries and save a cleaned scan or PDF.
The goal is not to make a document look dramatic. It is to make the information readable, complete, and safe to share.
Set up the page before the camera
Put the document on a stable, flat surface. Smooth a curl gently rather than holding a corner with a finger that will later appear in the frame. Remove objects that hide the page edges. A plain background helps you see whether the entire sheet is included, but it does not need to be white.
Place the light to one side of the page instead of directly above the phone. A window with a curtain, a bright wall, or another large indirect source is usually easier to control than a small bare lamp. If the page has a shiny coating, rotate the page or move the light until the reflection travels away from the lens. Do not solve glare by angling the document so far that its lines become visibly slanted.
The phone's flash is a poor first choice for a reflective page. Google's Pixel guidance warns that direct bright light can create glare, halos, and distortion, and recommends turning off flash and trying natural or indirect light when glare appears. The same physical problem can occur on other phones even when the menu labels differ.
Keep the phone parallel
Hold the phone directly above the document, with the camera facing the centre of the page. The phone and the page should form two parallel planes. When the top edge is noticeably narrower than the bottom edge, the phone is tilted; text near one end may become harder to read and a rectangular page can look like a trapezoid.
Use the live preview to compare the four corners. Move the phone higher or lower to fit the page rather than leaning it toward one edge. If you must work at an angle because of a reflection, make the smallest angle change that removes the reflection, then correct the perspective with a document-scanning tool if the result still has four clear corners.
Apple's current iPhone instructions for scanning documents allow automatic capture when page boundaries are detected and manual capture with corner adjustment. Google's Pixel Camera and Drive instructions likewise describe a scan prompt followed by a save, download, or share step. These are workflow options, not a guarantee that every phone model has the same controls.
Control glare instead of editing around it
Glare is a bright reflection that hides the printed detail below it. Look for it before taking the final frame, especially over signatures, small type, stamps, and dark ink. A page can appear readable in the full preview while a reflection has erased one important line.
Try this order:
- Turn off the flash.
- Move the light source to the side or diffuse it with a curtain or shade.
- Rotate the page or phone a few degrees while watching the reflection.
- Recheck that the page is still square and all edges remain visible.
- Take a test frame and zoom into the most important line.
Do not increase sharpening or contrast to rescue text that is hidden by a white reflection. Editing can make edges look harsher, but it cannot reliably recreate characters that were never recorded. If the page remains unreadable, change the light or use a scan mode before trying another edit.
Focus on the information, not the margin
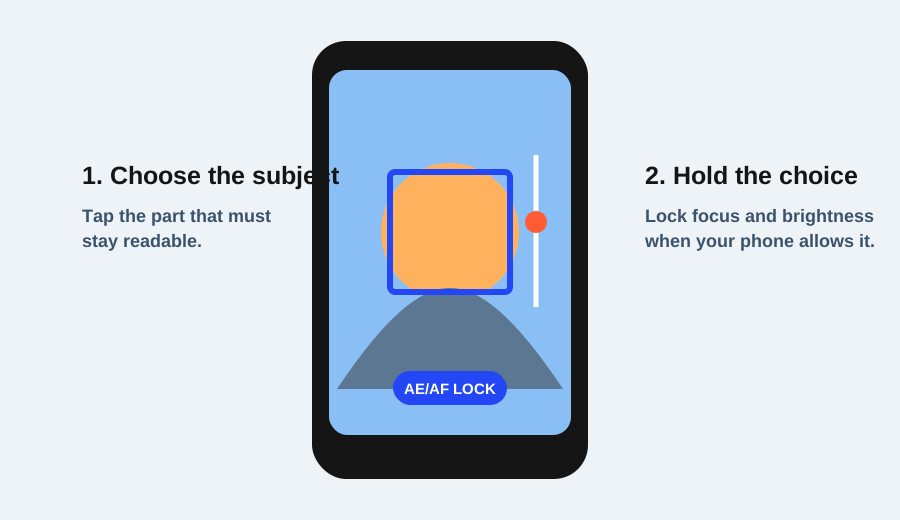
Tap a line of text or another important detail in the live preview when the phone offers a focus target. Google recommends tapping the subject and using adequate light for focus; it also notes that close documents can have soft edges on some Pixel Pro models because of the way larger sensors render close subjects. That is a reason to check the page, not a reason to assume the centre is enough.
After focusing, inspect a line near the centre and another near an edge. If the edge is soft, move the phone farther away and crop later, or use a supported document-scanning mode. Keep the page flat and avoid placing the camera so close that the lens has trouble focusing.
Expose for readable paper and ink. A white page does not need to be pure white if the letters are clear. A dark page with light text may need a different brightness choice. Check the brightest patch and the darkest important characters after each test frame.
Use a scan workflow when it fits the task
For a multi-page handout or a form that will become a PDF, a built-in scanner can reduce repetitive framing. On Pixel devices, the Camera or Drive app can present a “Scan document” prompt, then offer cleaning and saving options. In iPhone Notes, Scan Documents can capture pages automatically or manually, adjust corners, and save the result as a PDF in the note.
The scanner still depends on the original capture. If the page is reflective, tilted, or out of focus, automatic cropping will not fix the underlying problem. Review each page before adding another one, and keep the original photo until you have confirmed that the PDF contains every required detail.
Run a privacy check before sharing
Documents often contain names, addresses, account numbers, signatures, school details, or other information that is easy to overlook in a camera roll. Before sending the image or PDF, zoom out once to see the whole page and then zoom in on the fields that matter. Check the background as well: another page, envelope, or computer screen can reveal more than the document itself.
If a public example is needed, use a blank practice sheet or redact sensitive fields before publishing. Treat redaction as a separate step and verify that the original text is not still visible in layers, thumbnails, or an unredacted attachment.
A repeatable capture checklist
For a receipt, form, or printed page, use this short sequence:
- Flatten the page and remove objects from its edges.
- Choose a large, indirect light source and turn off flash.
- Hold the phone parallel; compare all four corners.
- Tap the important text and make the smallest readable test frame.
- Check a centre line, an edge line, and any signature or stamp.
- Crop or scan only after the information is sharp and glare-free.
- Review privacy before saving or sharing.
The best document photo is usually the least complicated one: controlled light, a square page, readable focus, and a deliberate final check.
Research sources
Sources
- Scan documents with your Pixel phone or tablet — Google Pixel Camera Help
- Scan text and documents in Notes using the iPhone camera — Apple Support
- How to scan on iPhone — Adobe Acrobat
- Take high quality photos on your Pixel phone or tablet — Google Pixel Camera Help