
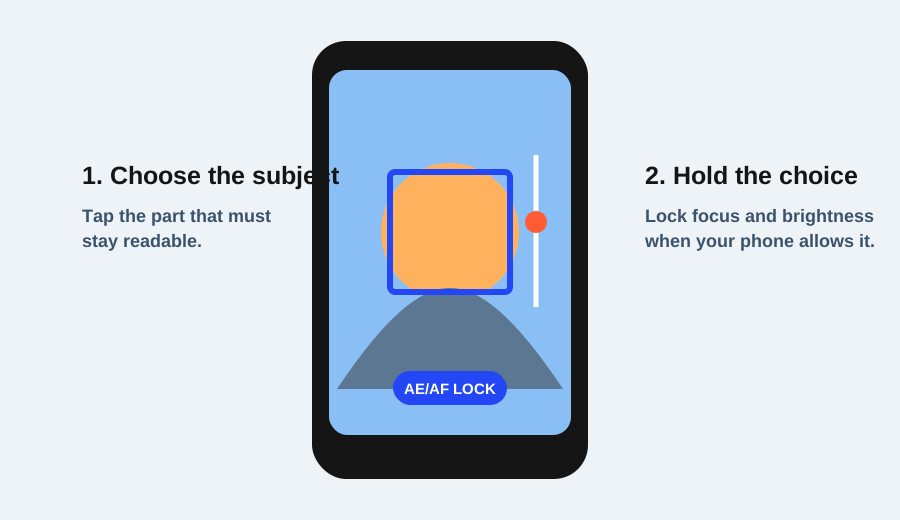
Phone cameras are designed to make many decisions automatically. That is convenient until the scene contains a bright window, a dark subject, a reflective document, or a subject that moves slightly between frames. The phone may change focus or brightness because it is responding to a different part of the scene than the one you care about.
The general solution is simple: identify the subject, tap where you want focus, adjust exposure if the phone provides the control, and use the device’s lock behavior when it is supported. The exact labels vary by model and operating system, so the principle matters more than memorizing one brand’s button path.
Start with the subject
Before tapping the screen, decide what needs to remain readable. It might be a person’s face, a printed line on a page, or an object against a bright background. If the phone chooses a different area, the camera can produce a technically exposed frame that still fails your purpose.
For a bright-window scene, the window may be the strongest visual signal. For a document, a reflective patch may be brighter than the printed text. For a person, a background face or high-contrast edge may attract the automatic system. Naming the subject gives you a reason for moving the focus and exposure controls.
Tap to move focus
On supported phones, tapping the subject moves the focus target. Apple’s current iPhone guide describes tapping a subject to show a focus frame, and it separates focus from exposure controls on supported models. Android phones and other systems use different labels, but the underlying action is similar: tell the camera which part of the scene matters.
After tapping, inspect the live preview rather than assuming the focus is correct. Look at the edge or detail that must be readable. For a face, check the eyes or the feature that carries the expression. For a document, check a line of text near the center and another near the edge. If the phone cannot hold the subject within its focus behavior, change the scene or use a supported focus option rather than repeatedly tapping at random.
Adjust exposure separately
Focus and brightness are related in the final image, but they are not the same decision. A phone may focus on a dark subject and still expose the overall frame for a bright background, or it may brighten the subject so much that the background loses detail.
Once the focus target is set, use the exposure control if your phone provides one. Move it only far enough to make the subject readable. Then check the brightest area and the darkest area that matter. The aim is not to make every part of the scene equally bright. It is to choose which information must survive.
Apple’s support documentation describes an exposure control that can be adjusted and locked for upcoming photos on supported iPhones. It also notes that menus and available controls depend on the model and camera mode. Treat any device-specific instructions as version-sensitive, and check the current manufacturer guide if the control is missing.
Lock when the scene needs consistency
Locking is useful when you want several frames to share the same focus and brightness. This might happen when you are comparing a composition, photographing a document, or waiting for a person to move into a chosen position.
The lock is not a guarantee that every later frame will be correct. It freezes a decision so the camera does not reinterpret the scene between shots. You still need to verify the subject and adjust when the distance, light, or purpose changes.
A useful sequence is:
- Place the subject where you want it.
- Tap the subject to set focus.
- Adjust exposure toward the subject’s important detail.
- Activate the phone’s focus/exposure lock if available.
- Recompose carefully and take the frame.
- Review the result at the detail that matters.
Do not assume that a lock remains active forever. Some devices release it when you close the camera, change modes, or reopen the app. The current device guide is the source of truth for those details.
A bright-window example
Imagine a person standing beside a window. If the phone exposes for the window, the face may become too dark. If it exposes for the face, the window may become very bright. Start by tapping the face, then move the exposure control until the face is readable without ignoring the brightest area.
If the person moves only slightly, a lock can help maintain consistency across several frames. If the person moves toward or away from the phone, a locked focus distance may become wrong. In that case, release the lock and refocus, or use a supported tracking mode. A lock is useful for a stable relationship, not a substitute for changing focus distance.
A document example
For a document, tap a line of text rather than a blank margin or reflective highlight. Keep the phone parallel to the page, adjust brightness only enough to preserve the text, and check all four edges. If the phone keeps changing exposure because of glare, move the light or the document before forcing the slider further.
Avoid photographing sensitive documents for examples that will be published. Blur or redact personal information, and remember that a readable image can reveal more than the person taking it intended.
When the control is missing
Some phones expose focus and exposure lock directly; others offer only a tap target or a temporary adjustment. Some camera modes disable particular controls. If the option is missing, do not infer that the phone is defective. Check the current support page for the exact model, switch to a mode that supports the needed control, or simplify the scene so the automatic system has fewer competing signals.
The useful habit is not memorizing one interface. It is separating three decisions: where focus belongs, how bright the subject should be, and whether those choices need to remain stable for the next frame.
Research sources
Sources
- Use iPhone camera tools to set up your shot — Use iPhone camera tools to set up your shot
- Photography for beginners: master the basics — Photography for beginners: master the basics
- A Basic Look at the Basics of Exposure — A Basic Look at the Basics of Exposure
- Edit a photo or video on your Pixel phone or tablet — Edit a photo or video on your Pixel phone or tablet