
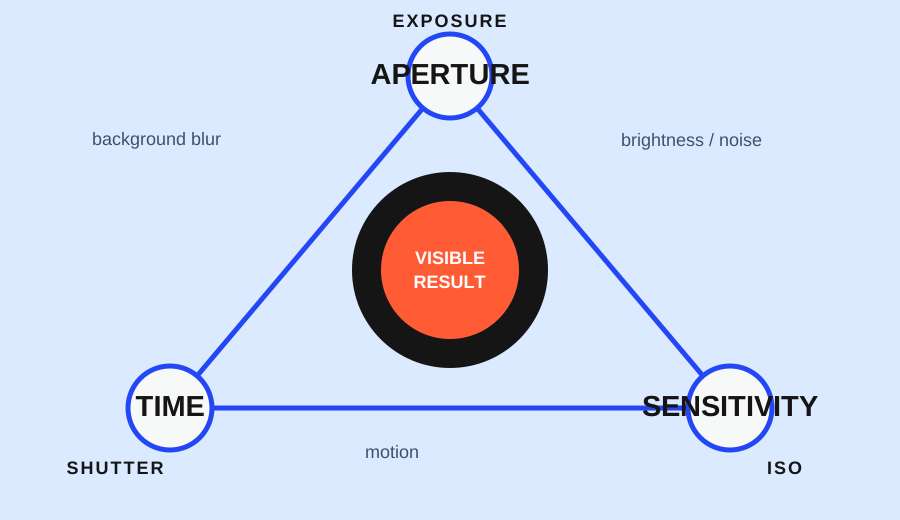
Use exposure compensation when the camera’s overall reading produces the wrong priority for your subject. Start with the subject: if a bright background makes the person too dark, bias the exposure brighter and check the brightest area; if a dark background makes a pale subject too bright, bias it darker and check the subject’s important detail. The direction is conditional, not a fixed “always plus” or “always minus” recipe.
Exposure compensation is a correction to the camera’s suggested exposure in modes that support it. The button, dial, scale, and available modes vary by camera, so this article explains the decision and the verification rather than one brand’s menu path.
Read the mismatch before touching the control
Look at the image and name the failure in one sentence. “The face is readable but the window is white” is different from “The window is detailed but the face is too dark.” The first problem may need a darker bias or a change in light; the second may need a brighter bias or a different background.
The camera is not trying to protect your chosen subject automatically. Its meter responds to the brightness pattern in the frame. Large bright or dark areas can pull the suggested exposure away from the tone you want to preserve. Nikon’s exposure guidance uses white, grey, and black examples to show why a meter can try to render different subjects toward a middle tone.
Bright background, dark subject: start brighter
Imagine a person beside a bright window. If the frame gives the window most of the visual weight, the person’s face can become too dark. If the face is the subject, try a small positive compensation direction in a supported automatic or priority mode, then review the face and the brightest part of the window.
The correction is not “make the whole frame bright.” It is “give the subject enough exposure to remain readable without losing every important highlight.” If the window detail is part of the purpose, the available range may not be enough to keep both the face and the outside view perfect. Move the person, change the background, or accept a silhouette when that is the intended result.
Nikon’s portrait guidance describes the same bright-background problem and notes that exposure compensation can be used when a subject is underexposed against a bright background. The page is a camera-brand example, not a universal promise about every phone or camera.
Dark background, bright subject: start darker
Now place a pale object on a dark table or against dark fabric. If the dark area fills much of the frame, the camera may raise exposure and make the pale subject lose texture. Try a small negative compensation direction, then inspect the brightest important surface rather than judging the whole frame by its average brightness.
The goal is not to make the background black. It is to keep the subject’s important surface from washing out while preserving enough surrounding context. If the object is meant to be a high-key subject with a white background, a brighter result may be intentional; the subject’s purpose decides the direction.
Use the preview, highlights, and histogram as checks
After each small compensation change, make a test frame and inspect the part of the image that carries the meaning. For a face, check eyes and skin detail. For a white object, check texture or edges. For a bright window, check whether any outside detail matters. For a dark scene, check whether the subject is still separable from the background.
If your camera offers a highlight warning or histogram, use it as an additional check rather than a replacement for looking at the subject. Nikon describes a histogram as a graphic view of the tonal range, with heavy concentration at either end warning that shadow or highlight detail may be lost. It still does not know which patch of the frame is the reason you took the picture. A warning that protects highlights can still leave the person too dark, and a lifted shadow can still be the wrong choice for a silhouette.
A simple correction flow
- Identify the subject or detail that must remain readable.
- Identify whether that detail is too dark or too bright in the test frame.
- Choose a small compensation direction: brighter for a dark subject against a bright background; darker for a bright subject against a dark background.
- Make another frame without changing the subject priority.
- Check the subject detail and the brightest important area.
- If the range is still insufficient, change the light relationship or accept a deliberate silhouette/high-key result.
This flow is more reliable than memorising a number because the same subject can move from a window to shade, or from a dark table to a white wall.
Two worked scenes
Window portrait
The face is the subject, but the window occupies most of the background. The first frame shows a dark face and a bright window. Start with a small brighter bias. Check the eyes, cheeks, and any part of the window that matters. If the face improves but the window loses detail, decide whether the background is part of the story. If it is, move the person or change the camera position before adding more compensation.
White object on a dark table
The object’s surface carries the detail, while the table is a large dark area. The first frame makes the object look flat or washed out. Start with a small darker bias and check the surface edge, texture, or printed mark that identifies the object. If the object becomes too dim, return toward zero or change the background so the meter sees a less extreme brightness pattern.
When compensation is not the whole solution
Exposure compensation cannot replace focus, stability, or better light. If the subject is moving, solve motion separately. If the face is out of focus, brightness is not the cause. If a window and face are far apart in brightness, more compensation may improve one while sacrificing the other; move the subject, change the background, add suitable light, or choose a silhouette rather than pushing the slider until highlights disappear.
The finished decision should be visible in the frame: the chosen subject is readable, the important highlights are not unintentionally lost, and the remaining trade-off matches the purpose of the photograph.
Research sources
Sources
- Photography for beginners: master the basics — Adobe
- A Basic Look at the Basics of Exposure — Nikon USA
- Camera settings 101: Getting to know the basics — University of Queensland Student Employability Centre
- How to take a good photo: Photo guide — UK Government
- The Nikon Guide to Digital Photography — Nikon USA
- Take Better Portraits — Nikon USA
- Learning How to Use Your Camera’s Histogram — Nikon USA
- High Dynamic Range Photography — Nikon USA