
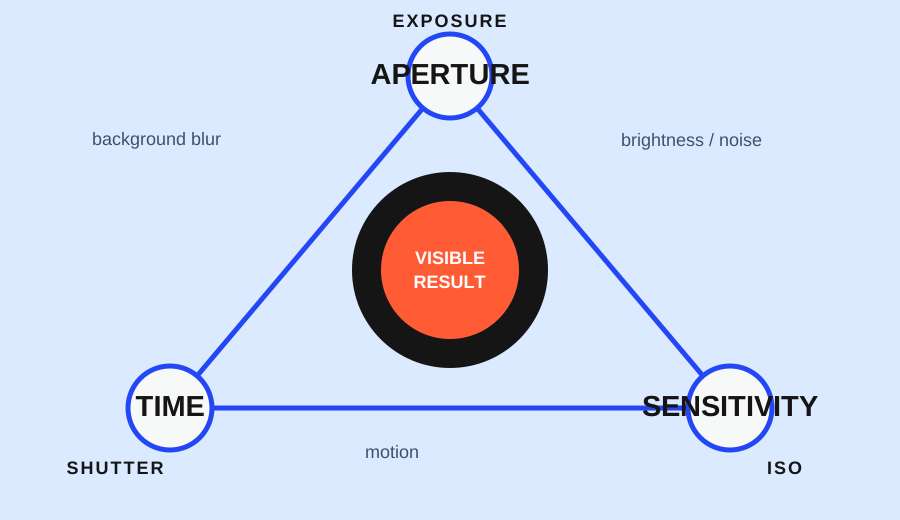
Choose Aperture Priority when the look of the sharp area matters most: a portrait with a softer background, a still subject with controlled depth of field, or a scene where you want to keep an aperture choice while the light changes. Choose Shutter Priority when the rendering of movement matters most: freezing a moving person, showing a blur, or keeping a chosen shutter time while the camera matches the aperture. If neither variable is the clear priority, start with the mode that protects the mistake you are most likely to make and check the other setting before shooting.
The names vary by camera. Aperture Priority may appear as A or Av; Shutter Priority may appear as S or Tv. The label is less important than the protected variable.
The decision matrix
| Scene or goal | Starting mode | Variable you protect | Main failure to check |
|---|---|---|---|
| Static portrait or object | Aperture Priority | Aperture and depth of field | The camera chooses a shutter speed that is too slow for a sharp frame |
| Moving person, bicycle, or water | Shutter Priority | Shutter speed and motion rendering | The camera reaches an aperture limit or the frame becomes too dark |
| Low light with a moving subject | Shutter Priority, with Auto ISO if supported | Minimum useful shutter speed | Noise, underexposure, or device-specific ISO behavior |
| Scene with no dominant visual priority | Either, then review | The decision you can explain | You change settings without checking the result |
The table is a starting rule, not a universal winner. UQ’s beginner guide describes Aperture Priority as a way to control depth of field for relatively stationary subjects and Shutter Priority as a way to freeze or blur movement. Nikon’s exposure guidance likewise treats aperture, shutter speed, and ISO as connected decisions.
What Aperture Priority protects
In Aperture Priority, you choose the f-stop and the camera selects a matching shutter speed for the exposure. The practical reason to choose it is visual: aperture changes how much of the scene appears acceptably sharp and can change the relationship between a subject and its background.
For a static portrait, start by deciding how much of the face or object must be sharp. Then look at the shutter speed the camera has selected. If it is slow enough for hand movement or subject movement to show, the mode has protected the depth-of-field choice but created a stability problem. Raise ISO, add available light, support the camera, or choose a different aperture if the resulting frame does not meet the purpose.
This is why “Aperture Priority is for portraits” is too narrow. It can also help with a still life, a landscape where a chosen depth of field matters, or a document-like subject where you want to keep the page readable from edge to edge. The check is always the same: inspect the important sharp area and the shutter speed that made it possible.
What Shutter Priority protects
In Shutter Priority, you choose the shutter speed and the camera selects a matching aperture. The practical reason to choose it is motion: you decide whether a moving edge should look more frozen, partly blurred, or deliberately stretched through the frame.
For a person walking across a room, choose a faster shutter direction when the hands or feet must remain readable. For water or a moving object where the path itself is part of the picture, a slower direction may be the point. The camera still has to find an aperture that can produce the exposure. If it reaches the end of its range, the frame can become too bright or too dark even though the chosen shutter speed was intentional.
The failure check is therefore visible and simple: inspect the moving detail, then inspect the exposure warning or overall brightness. A shutter choice that renders the right motion but loses the subject in darkness is not finished.
Low light: protect motion first, then inspect the cost
Low light makes the comparison less tidy because the camera needs enough light for the chosen shutter and aperture. Suppose a person is moving near a dim window. Shutter Priority lets you protect a speed that gives the person a chance of looking sharp. If Auto ISO is available, the camera may use ISO as another automatic variable; exact behavior depends on the camera, so check its current manual rather than assuming every model responds the same way.
The cost may be visible noise, a wider aperture than you wanted, or an exposure limit. Review the face, hands, and shadow areas at the size where the picture will be used. If the result is too dark, decide whether more available light, a wider aperture, a slower subject, or a different visual intention solves the problem better than simply changing modes.
Exposure compensation is the correction layer
Priority mode does not mean the camera’s first meter reading is the final creative decision. When the subject is much darker or brighter than its background, exposure compensation can bias the camera’s result in modes that support it. A bright-window portrait may need a brighter bias so the face is readable; a pale object on a dark background may need a darker bias to keep important highlights from washing out.
Treat compensation as a correction after identifying the protected variable. In Aperture Priority, keep the chosen depth-of-field goal visible while checking shutter speed and brightness. In Shutter Priority, keep the chosen motion goal visible while checking aperture limits and brightness. Move the compensation control only far enough to solve the subject problem, then review the brightest important area and the darkest required detail.
Three matched scenarios
Static portrait
The person is still, and the background should be less distracting. Start with Aperture Priority because depth of field is the leading decision. Check the selected shutter speed and the eyes or other critical detail. If the frame is soft from camera movement, support the camera, add light, raise ISO, or choose a different aperture.
Moving subject
The subject crosses a fixed point, and the hands should not become an accidental blur. Start with Shutter Priority because motion rendering is the leading decision. Check the selected aperture, the exposure warning, and the moving edge. If the subject is still blurred, the chosen speed may be too slow for that movement or the camera may have moved as well.
Low-light scene
The subject moves in a dim room and the background matters. Start by protecting the minimum useful shutter speed, then observe what the camera does with aperture and ISO. If the result is noisy but readable, it may be more useful than a cleaner frame with unintended motion blur. If the face is dark against a bright window, add a small compensation change and check the face and the brightest background area again.
A mode choice you can explain
Before pressing the shutter, complete this sentence: “I am choosing ___ because I need ___ to remain predictable, and I will check ___ after the frame.”
- Aperture Priority because depth of field must remain predictable; check shutter speed and the required sharp area.
- Shutter Priority because motion rendering must remain predictable; check aperture, brightness, and the moving detail.
If you cannot name the protected variable, use a simpler mode for the scene or make one test frame before committing to a series. The better beginner mode is the one that makes the intended result and the next verification step clear.
Research sources
Sources
- Photography for beginners: master the basics — Adobe
- A Basic Look at the Basics of Exposure — Nikon USA
- The exposure triangle: aperture, ISO and shutter speed — MPB
- Camera settings 101: Getting to know the basics — University of Queensland Student Employability Centre
- Nikon School: Shooting Action — Nikon School
- Understanding Auto ISO — Nikon USA
- The Nikon Guide to Digital Photography — Nikon USA