
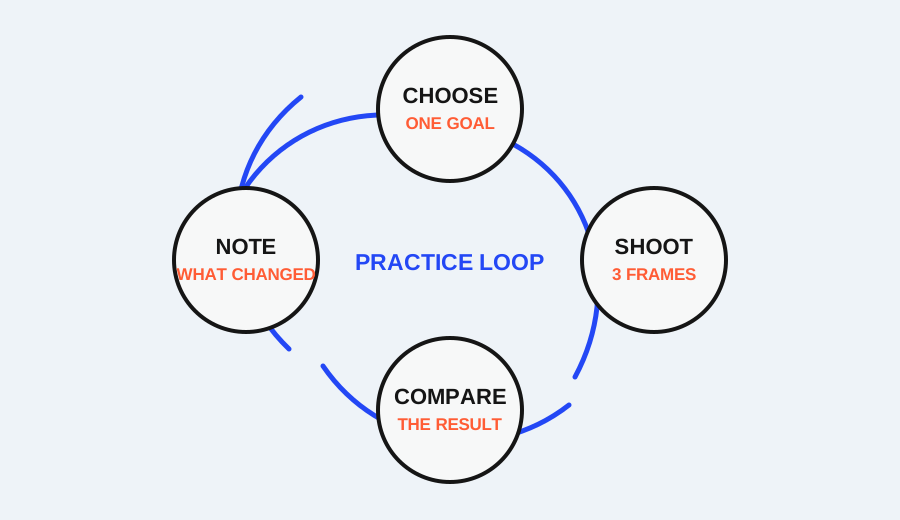
Manual mode is not proof that someone understands photography. The stronger test is whether a photographer can predict what a change will do, make the change, and check the visible result. Manual can help with that learning loop, but aperture priority, shutter priority, or program mode can also expose the same relationships while the camera handles part of the arithmetic.
This is a learning argument, not a ban on Manual mode. Manual is valuable when stable light or a consistent series makes complete control useful. It is simply the wrong badge to use as a shortcut for understanding.
What Manual changes—and what it does not
Exposure depends on the relationship among aperture, shutter speed, and ISO. Nikon describes Manual as a mode in which the photographer controls all three exposure variables while the built-in meter provides guidance. That gives you maximum control, but it also means that every change creates another decision to check.
Manual does not automatically teach the consequences of those decisions. A beginner can turn dials until the meter moves, press the shutter, and still be unable to say why the background changed, why motion blurred, or why noise appeared. The mode exposes controls; practice must connect the controls to visible evidence.
The priority modes can make the lesson clearer
In Aperture Priority, you choose the f-stop and the camera selects a matching shutter speed. Nikon's guide connects the choice to depth of field and warns that a shutter speed selected by the camera can still become too slow for a sharp hand-held photograph. That is a compact lesson: aperture changes the look, while shutter speed is a consequence that must be checked.
In Shutter Priority, you choose the shutter speed and the camera selects an aperture. Nikon describes the mode as useful for stopping action or showing blur, while also noting that the chosen speed can exceed the lens's available aperture range. That is another useful prediction test: choose the motion result first, then look for the exposure warning or the aperture limit.
Program mode lets the camera choose a shutter-speed/aperture combination, and some cameras let you shift that combination while preserving the total exposure. This can be a low-friction way to notice that several settings can reach a similar brightness while producing different motion or depth-of-field results.
The point is not that priority modes are easier forever. It is that they isolate one relationship at a time, which can make a beginner's prediction easier to state and verify.
Use a prediction check instead of a mode check
Before each short practice sequence, write one sentence:
> “I am changing ___ because I want ___ to look different, and I will check ___ after the frame.”
Examples:
- “I am choosing a faster shutter speed because I want a walking hand to look less blurred, and I will check the hand and the exposure warning.”
- “I am opening the aperture because I want less depth of field, and I will check the subject's eyes and the background.”
- “I am raising ISO because I need a usable shutter speed in dim light, and I will check shadow detail and noise.”
Take two or three frames that differ in one deliberate variable. Review the exact feature named in the sentence, not just the overall impression. If the result is different from the prediction, record what changed. This turns the camera into a feedback device rather than a test of whether you remembered a prestigious mode.
When Manual is the better tool
Manual earns its place when the relationship between frames should stay consistent. A stable indoor setup, a sequence made under unchanged light, or a deliberate shutter-and-aperture combination can benefit from setting the exposure once and keeping it there. Nikon's guide describes the payoff as maximum control, while also calling Manual the most difficult mode to master.
Manual can also remove unwanted variation when the camera's meter would react differently to a bright shirt, a dark background, or a changing composition. In that case, the benefit is repeatability. The photographer still needs to check focus, motion, highlights, and the subject's actual purpose.
The boundary is changing light or changing distance. If the subject moves from shade into sun, or the camera moves between rooms, a previously correct manual setting may no longer fit. A priority mode with exposure compensation or a quick meter check can be the more useful learning tool in those conditions.
One decision, two sensible paths
Imagine a beginner photographing a person beside a bright window. In Aperture Priority, the learner can choose an aperture that keeps the face and intended background relationship, then watch whether the camera selects a shutter speed slow enough to introduce hand movement. In Manual, the learner can set that aperture and a shutter speed deliberately, then adjust ISO until the meter and the face look right. Both paths can teach the same relationship if the learner predicts the result and checks it.
The difference is where the next question appears. Aperture Priority makes the shutter-speed consequence visible; Manual makes the ISO consequence visible after the photographer chooses both other variables. Choose the path that exposes the gap in your current understanding, not the path that sounds more advanced.
The strongest counterargument
A fair objection is that Manual makes the exposure triangle explicit. Because the camera stops choosing for you, you must confront how aperture, shutter speed, and ISO trade off. For a learner who already knows what each variable protects, that friction can accelerate consistency and make a repeatable setup easier to understand.
That argument is strongest in stable light and weakest when the beginner is still trying to identify which variable controls which visible effect. Manual may improve learning for that learner; the claim here narrows rather than denies its value.
How to tell whether a mode is helping
After a week of practice, ask four questions:
- Can you predict the main visible change before touching a control?
- Can you name the secondary risk, such as blur, noise, or lost depth of field?
- Do you inspect the result at the detail that matters?
- Can you choose a different mode when the light or subject changes?
If the answer is yes, the mode is serving your understanding. If the answer is no, switching to Manual may only add more settings to guess at. Return to a mode that lets you isolate one decision, then repeat the prediction-and-check loop.
This test is falsifiable rather than motivational. If repeated practice in Manual lets a particular learner predict and verify exposure more quickly and with fewer missed frames in the conditions they actually photograph, Manual is the better next mode for that learner. The thesis does not require a priority mode once its teaching job is complete.
A better beginner milestone
Replace “I shoot Manual” with a more useful milestone: “I can explain what I changed, why I changed it, and what I will verify in the next frame.” Manual may be part of that path, but it is not the destination. The evidence of progress is a reliable connection between a camera control and a visible photographic result.
Research sources
Sources
- Photography for beginners: master the basics — Adobe
- A Basic Look at the Basics of Exposure — Nikon USA
- The exposure triangle: aperture, ISO and shutter speed — MPB
- Your Nikon School guide to improving your photography — Nikon School
- How to take a good photo: Photo guide — UK Government
- Nikon School: Shooting Action — Nikon School