
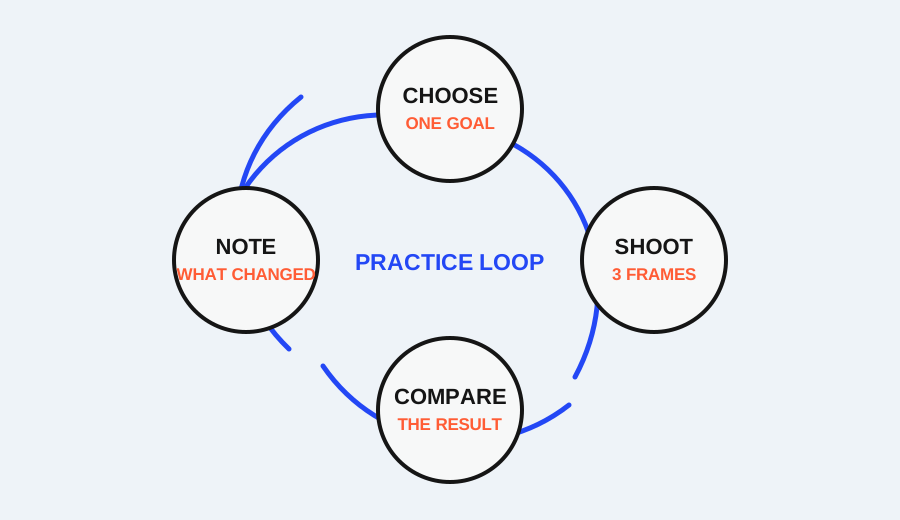
Reading about photography is useful, but it does not automatically teach your eye what to notice. A short practice plan works better when each day isolates one decision and ends with an observable check. This seven-day sequence uses a phone or an entry-level camera and takes about 15–30 minutes per day.
The plan is not a promise of guaranteed improvement. It is a structured way to create comparable examples. The exposure triangle, composition, focus, light, and editing are related, but separating them for a day makes it easier to identify what changed.
Before day one: set up a fair practice
Choose one ordinary subject that will remain available for several days: a mug, a chair near a window, a plant, or a willing person. You do not need a special location. Keep a simple note with the date, the device, the main choice you made, and what you observed.
Use the same basic image review habit throughout the week:
- Look at the full frame first.
- Inspect the detail that mattered for the exercise.
- Write one sentence about what changed.
- Do not change three major controls at once.
If your phone or camera does not expose a named control, use the closest supported option and record that limitation rather than guessing.
Day 1 — Find the subject
The first exercise is composition before settings. Make three frames of the same ordinary scene.
- Take the frame from your first position.
- Move left or right to change the background relationship.
- Change height or distance to change the amount of context.
For each frame, write the subject in one short phrase. Then mark the strongest distraction. The check is simple: can another person identify what the frame is about without an explanation?
This exercise uses the same questions recommended in beginner composition guidance: where the subject sits, what the background does, and what has been included or left out. Do not grade the images by beauty. Grade them by clarity of intention.
Day 2 — Change one exposure control
Use a scene with a visible light difference, such as a subject near a window or a bright object against a darker background. Make one frame with the camera’s current setting. Then change only one exposure control that your device offers.
If you can adjust aperture, compare how the sharp area and brightness respond. If you can adjust shutter speed, use a subject with small movement and compare the rendering. If the device exposes ISO, compare how the file behaves when you need more sensitivity.
The check is not “Which frame is prettier?” It is “What changed because of the one control I touched?” Write down the visible change and the cost. A brighter frame may carry more noise; a sharper moving subject may need a different balance of light.
Day 3 — Freeze or show movement
Choose a repeatable moving subject: a person walking past a fixed point, a hand moving a cup, or water running from a tap. Make three frames with the same general composition but different shutter-speed directions when your device allows it.
Your three targets are:
- movement that looks mostly frozen,
- movement that is partly visible,
- movement that is intentionally blurred.
If you are using a phone with limited manual control, use available motion or burst controls and record what the phone permits. The check is to name the visual intention of each frame. The exercise is successful when “blur” stops being a single category and becomes a result you can choose or reject.
Day 4 — Diagnose focus and sharpness
Return to a static subject with a clear edge. Make one frame handheld, one with the device supported, and one after deliberately placing the focus target on the subject.
Compare the same edge in each frame. Ask whether the whole frame moved, whether a different plane is sharp, or whether the intended subject improved after the focus target changed. Do not crop away the evidence before comparing it.
The check is a cause statement, not a score: “The supported frame improved,” “the background was sharper than the subject,” or “the focus target changed the result.” If no cause is clear, record that uncertainty and repeat only one part of the check.
Day 5 — Read one window
Use one window and one subject. Keep the window fixed while changing one relationship at a time: turn the subject, move the subject closer or farther, or change the camera viewpoint.
Make notes about direction, contrast, and background brightness. The purpose is to notice that light is not just “good” or “bad.” A side position may show texture; a front position may reduce contrast; a backlit position may create a bright background that requires an exposure decision.
The check is a sentence that begins, “The light changed because…” If the sentence cannot name a relationship, make the movement larger and try again.
Day 6 — Make a restrained edit
Choose one frame from the week. Edit it in four passes: crop, solve the main light problem, make one restrained color decision, and compare with the original. Keep the original file or an undo path available.
Write down what each adjustment was meant to solve. If a filter does not solve the named problem, leave it out. The check is whether the subject is easier to read without making a new problem at the edges, in the highlights, or in the color.
Day 7 — Review the week
Place the exercise notes beside the images. Look for one repeated gap:
- Do you choose the subject late?
- Do you change settings without naming a result?
- Do you confuse movement blur with missed focus?
- Do you notice light only after editing?
- Do you make more changes than you can explain?
Choose the next practice based on that gap. If exposure choices were unclear, repeat Day 2 with a simpler subject. If focus diagnosis was unclear, repeat Day 4 with support. If composition was unclear, repeat Day 1 and make the viewpoint changes larger.
If you miss a day, do not restart the entire plan or double the workload. Continue with the next exercise and mark the missing day as an open question. A useful practice sequence is one that reveals what you do not yet understand; it does not need to look perfect on a calendar.
You can also shorten the plan when time is limited. Keep the same order but make each exercise one controlled comparison: two viewpoints on Day 1, two exposure choices on Day 2, two motion choices on Day 3, and so on. The result will be narrower, but the learning signal can remain clear as long as you record what changed.
For a phone-only version, use exposure adjustment, focus taps, lock behavior, crop controls, and the original-versus-edit comparison available on the device. For a camera with manual controls, use the named settings only when they serve the day’s question. The device path can differ while the reader outcome stays the same: identify one choice, observe one result, and describe one next step.
Keep the notes short enough that they do not become another project. One sentence per frame is sufficient if it names the choice and the visible result.
What counts as progress
Progress in a first week is not a sudden supply of perfect photographs. It is a more precise explanation of a result. “It looks bad” is difficult to act on. “The face is readable, but the window is too bright,” or “the background is sharp while the moving hand is blurred,” points toward a next decision.
That is the purpose of this sequence: turn photography from a collection of mysterious settings into a set of small, observable choices. The phone or camera remains useful because it gives you a way to compare decisions—not because it guarantees a particular look.
Research sources
Sources
- Photography for beginners: master the basics — Photography for beginners: master the basics
- A Basic Look at the Basics of Exposure — A Basic Look at the Basics of Exposure
- 5 Easy Composition Guidelines — 5 Easy Composition Guidelines
- Use iPhone camera tools to set up your shot — Use iPhone camera tools to set up your shot
- Edit your photos — Edit your photos
- How to take a good photo: Photo guide — How to take a good photo: Photo guide